Are you ready to elevate your gaming experience to the next level? Welcome to our comprehensive tutorial on mastering the Rockstar Editor for GTA 5 and FiveM. If you’re a gaming enthusiast with a passion for storytelling and creativity, you’re in for a treat. The Rockstar Editor, introduced by the brilliant minds at Rockstar Games, has revolutionized the way gamers capture, edit, and share their most memorable moments within the expansive worlds of ‘Grand Theft Auto V’ and ‘GTA Online.’
The Power of the Rockstar Editor:
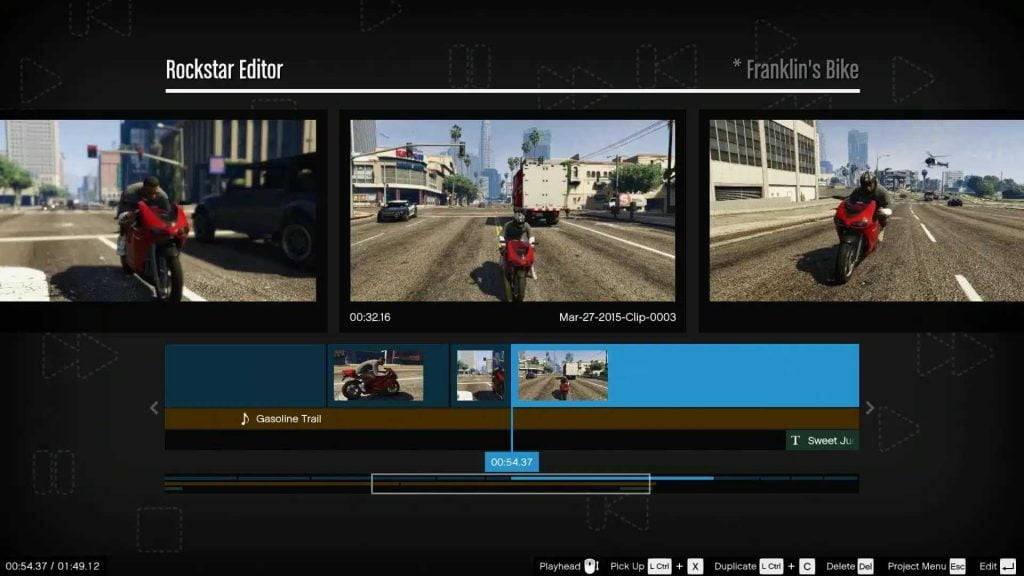
Rockstar Editor
The Rockstar Editor isn’t just another tool; it’s a gateway to crafting cinematic masterpieces. Let’s dive into the steps that will transform your gaming adventures into captivating narratives.
Step 1: Capturing Your Gameplay Footage:
Your journey begins with the press of a key – the ‘F1’ key. This key initiates the recording of your gameplay footage in ‘GTA V.’ But remember, this is no ordinary recording; it’s about capturing diverse scenes, perspectives, and emotions. Think beyond the main action – embrace dialogues, chases, serene moments, and more. If you’re using FiveM, the multiplayer mod for ‘GTA V,’ you have the added advantage of incorporating community-created content into your footage, adding a unique flavor to your project.
Step 2: Unleashing the Power of the Editor:
Now, you’re armed with a collection of raw footage, and the Rockstar Editor is your canvas. Navigate to the Editor from the pause menu, create a new project, and add your clips. The timeline is your playground – reorder clips, experiment with camera angles, and immerse yourself in a world of creative possibilities. Your storytelling skills will shine as you sculpt the flow of your story, guided by your artistic instincts.
Step 3: Mastering the Camera:
The free camera feature is the heart of the Rockstar Editor. It grants you the power to explore every corner of your virtual world. Zoom in on character expressions, capture high-speed chases, or unveil the beauty of your surroundings. Remember to experiment with blend modes to enhance transitions between shots – a subtle touch that can elevate your video to cinematic heights.
Step 4: Incorporating Effects and Audio:
Visual filters, depth of field adjustments, and audio enhancements await you. Play with the aesthetics using filters, ensuring they align with your narrative’s mood. Dive into the audio tab to add tracks from in-game radio stations or customize sound effects for added immersion. And a friendly reminder – respect copyright laws when selecting music for public sharing.
Step 5: Finalizing and Sharing Your Creation:
With your masterpiece in place, it’s time to share it with the world. Choose your video’s quality during the exporting process, balancing quality and rendering time. Once the render is complete, unleash your creation onto platforms like YouTube or share the raw file for a personal touch. The ‘GTA V’ community and beyond await your vision.
Video Tutorial