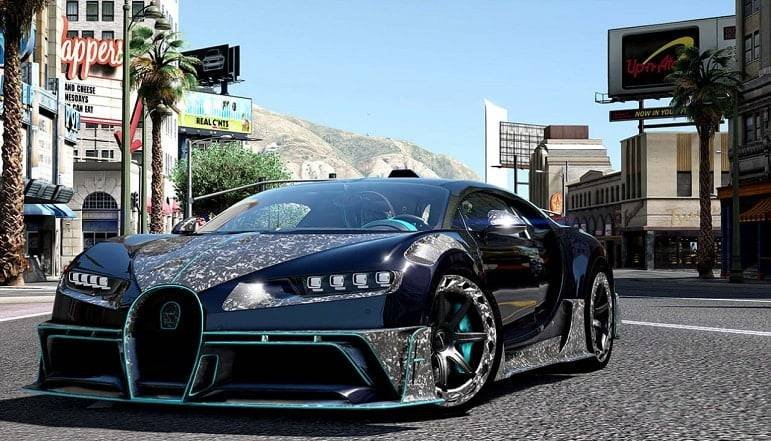
Introduction
Instructions for Installing Imported Vehicles on a FiveM Server in 2023
Welcome to another tutorial on FiveM-mods.net! This guide will walk you through the steps to install imported cars on your FiveM server. Adding imported cars to your FiveM server can offer a diverse range of vehicles, thereby enhancing your players’ gameplay experience. Without further ado, let’s begin (Imported Vehicles)
Prerequisites
- A functional FiveM server
- Access to your server’s file directory through FTP or local access
- A mod file for your desired import car in .yft, .ytd, and .meta formats
- OpenIV software to extract the .meta file from the .rpf archive, if required.”
Step 1 – Download the import car mod you desire
Look for the import car mod you want on a reliable website such as Fivem.shop or LCPDFR.com. Verify that the mod is compatible with FiveM Server, then proceed to download the necessary files in .yft, .ytd, and .meta formats
Step 2 – Extract the .meta file (if necessary)
Certain car mods have the .meta file included in an .rpf archive. Use OpenIV software to extract it. Firstly, download and install OpenIV, then launch it and choose “GTA V” for Windows. Next, navigate to the .rpf archive that contains the .meta file, extract it, and save it to a folder.
Step 3 – Transfer the import car mod files to your server.
Connect to your FiveM server’s file directory either through an FTP client or local access. Proceed to the “resources” folder and make a new folder titled “importcars” (without quotes). Within the “importcars” folder, create another folder named “stream,” and then upload the .yft and .ytd files into this folder. (Imported Vehicles)
Step 4 – Include the .meta file
Within the "importcars" folder, create a new text file named "__resource.lua" (without quotes) and use a text editor to open it. Copy and paste the code given below into the file:
resource_manifest_version '44febabe-d386-4d18-afbe-5e627f4af937'
files {
'vehicles.meta',
}
data_file 'VEHICLE_METADATA_FILE' 'vehicles.meta'
client_script {
'vehicle_names.lua'
}
Save and close the file, and then upload the extracted .meta file to the “importcars” folder. Rename it to “vehicles.meta” (without quotes).
Step 5 – Modify the vehicle names file
Create a new text file within the “importcars” folder named “vehicle_names.lua” (without quotes). Open the file using a text editor and add the code shown below
Citizen.CreateThread(function()
AddTextEntry("ADDONCARNAME", "DISPLAYNAME")
end)
Replace “ADDONCARNAME” with the internal name of the car mod (usually located in the .meta file) and “DISPLAYNAME” with the preferred in-game display name for the car. Save and close the file.
Step 6 – Include the “importcars” resource in the server.cfg file
Go to the primary directory of your server and use a text editor to open the “server.cfg” file. Append the following line at the end of the file:|Imported Vehicles
start importcars
Save and close the file.

Step 7 – Restart your FiveM server
Restart your FiveM server to apply the changes and make the import car mod ready to use in your server.
Great job! You have successfully added a new import car mod to your FiveM server. Now players can use these custom cars in-game. It’s important to note that you can install several import car mods using the same process, but you need to create different folders for each car mod and assign unique display names to avoid any issues. Imported Vehicles
Furthermore, you can improve your FiveM server with a range of other modifications, such as custom maps, scripts, and skins. Make sure to download mods only from trusted sources and strictly adhere to the mod creators’ guidelines for correct installation. Imported Vehicles
We trust that this guide has aided you. If you have any queries or encounter any difficulties during the installation, please feel free to post a comment on our blog or seek assistance from the FiveM community. Have fun gaming with your new import cars on your FiveM server! Imported Vehicles
Second Way
Here are the instructions for installing imported vehicles on a FiveM server in 2023:
- Find and download the desired vehicle mod from trusted modding websites or forums that offer FiveM-compatible mods for your specific version of GTA V.
- Extract the downloaded mod files using file extraction software like WinRAR or 7-Zip. You should see various files with extensions such as .yft, .ytd, and .meta.
- Locate the “resources” or “server-data” folder within your FiveM server’s installation directory. This folder contains the server resources and configurations.
- Create a new folder inside the resources folder with a descriptive name for the vehicle mod, such as “my_custom_vehicles.”
- Copy all the extracted mod files from Step 2 into the newly created folder, ensuring that you maintain the mod’s original file structure, including separate folders for vehicle models, textures, and other associated files.
- Edit the server configuration file, typically named server.cfg or fxserver.cfg, found in the main server directory. Use a text editor to add the name of the vehicle mod folder created in Step 4 to the “AutoStartResources” section. It should look like this:
ensure my_custom_vehicles. - Save the server configuration file and start your FiveM server. The server will now load the vehicle mod, making it available for players to use.
- Test the imported vehicles by joining the server as a player. Check if the vehicles are visible and functioning correctly. Depending on the mod and server settings, you may need to spawn the vehicles using admin commands or locate them in specific areas within the game world.
Note: Always ensure that you have the necessary permissions and rights to install mods on your FiveM server. Exercise caution when downloading mods from third-party sources, verifying their compatibility and authenticity to avoid any potential security risks.
These steps should help you successfully install and enjoy imported vehicles on your FiveM server in 2023.

